Shopware 6

Our plugin for Shopware 6 gives you access to the native payment features of the HiPay payment plugin.

Features

    • Hosted Payment page integration (Hosted Page / Hosted Fields)
    • Credit cards: accept credit card payments on your website.
    • Local payment methods: accept local payment methods, including iDEAL, SOFORT, Giropay, and many others.
    • Manual / Automatic capture
    • Refund – Full and partial capture available from the Shopware back end 3DSV2.
    • For 3-D Secure v2, the card issuer performs the authentication in your application or payment form. The shopper’s identity may be verified using a passive, biometric, or two-factor authentication method.

For more information, please refer to the 3-D Secure 2 authentication flows.

Supported payement methods

        • CB
        • Visa 
        • Mastercard
        • Maestro
        • PayPal
        • American Express
        • SEPA
        • Bancontact
        • Giropay
        • iDEAL
        • SOFORT
        • MB WAY
        • Multibanco
        • MyBank
        • Przelewy24

Supported version

This documentation is based on the latest version of the plugin, available on GitHub

Our plugin supports the following version: Shopware 6.3.0.0 or higher, using PHP 7.2 or higher.

We cannot offer you support if you are not using the default Shopware checkout. We do not recommend customizing the plugin, as this may make it more difficult to update and maintain your integration. If you decide to customize it, please follow Shopware’s recommendations and keep a copy of the custom code added to your integration.

More information about the CMS versions supported by HiPay 

Prerequisites

Before adding HiPay as a gateway, make sure to have a test account and a production account in HiPay Console. They allow us to have the credentials to make the link between our Shopware plugin and HiPay Console.

If you do not have a HiPay Console account or use HiPay Professional, please contact our Support team.

Installation of the HiPay payment plugin

The HiPay payment plugin for Shopware 6 is open-source and available on GitHub. Our GitHub repository is connected to Packagist so that you can include it in your project through Composer:

1. In your command-line tool, go to the root of your Shopware 6 application and run 

composer require hipay/hipay-enterprise-shopware-6

bin/console plugin:refresh  

bin/console plugin:install –activate hipay

2. In your Shopware back end, go to Settings > System > Plugins.

3. Find the HiPay payment plugin and switch on the “Activate” toggle button.

4. Configure your plugin and activate your payment methods.

Configuration

    1. Log in to the Shopware back end and go to Settings > System > Plugins.
    2. Find the HiPay payment plugin, and select the action button (…) > Config.
    3. Fill in the following fields.

Step 1: choose the payment environment

    • Live: Production environment to process real transactions.
    • Test: Test environment, strongly recommended to test your website before putting it live with different test cards provided by HiPay.

Step 2: API credentials

First, you need to configure your private and public API credentials, as well as the passphrase.

You can find this information in HiPay Console (in the old interface): Integration > Security Settings.

Back in the Shopware back end, integrate the credentials for live and test environment. Fill in the following fields: 

    • Private credentials, 
    • Public credentials.  

Step 3: notifications

HiPay uses notifications to inform your Shopware back end of payment status changes. For more information, please refer to server-to-server notifications. 

Synchronization 

To receive notifications, fill in the following fields for the HiPay payment plugin: 

    • Secret passphrase, 
    • Hashing algorithm. 

You can find this information in HiPay Console: 

    1. Sign in to HiPay Console  and click on “Old interface” in the menu.
    2. In the old interface, select your account and go to > Integration > Security Settings.

Server-to-server notifications

 To inform you of events related to your payment system, such as a new transaction or a 3-D Secure transaction, our platform can send your application server-to-server notifications.

Notifications must be configured in HiPay Console. 

    1. In HiPay Console,  click on “Old interface” in the menu.
    2. Select your account and go to > Integration > Notifications.

You must activate all notifications and all settings

Settings

Description

Notification URL 

The plugin automatically sends your instance URL.
The value is not mandatory.


Request method

Method with which you want to receive requests: XML / HTTP POST.

Status notification

Here, you can define which notifications you want to receive based on the transaction status. More information on the status.

Check all notifications and all parameters.

The notifications are processed in your Shopware back end with an asynchronous cron job  running every 5 minutes.

Payment procedure

To configure the capture method, it is necessary to add an option in HiPay Console. 

    1. In HiPay Console,  select “Old interface” in the menu.
    2. Select your account and go to > Integration > Payment Procedure. 
    3. In the “Default payment procedure” section , select “On-demand data capture”.

Step 4: capture method 


Depending on your activity,  you can choose between two methods to capture your transactions: 

Automatic 

Manual

All transactions will be automatically captured by HiPay.

Once credit card transactions are authorized, you must manually perform a full or partial capture of the transaction.


Manual capture is currently only available for Mastercard, Visa, CB and American Express.


With other payment methods, transactions are automatically captured.

Step 5: integration type

With our HiPay payment plugin, you can  choose two  integration types: 

    • Hosted Page:  Customers will be redirected to the payment page to securely process the payment with all the payment methods configured. 
    • Hosted Fields: During  checkout, customers select a payment method and  fill in the necessary fields without being redirected to the payment page. 

Please note:  The fonts and colors of Hosted Fields can be customized at the bottom of the page.

Step 6: 3DSV2 

The 3DS v2 protocol provides a mechanism for strong authentication in compliance with PSD2. To this end, you have the possibility to choose between 2 modes: 

    • 3-D Secure authentication mandatory: An authentication is required to proceed with the transaction. This authentication can either be a 3DS v2 challenge flow or a 3DS v2 frictionless flow, without any user input required. If the authentication fails, the transaction will be refused and the client will not be charged.
    • 3-D Secure authentication, if available: If the payment method allows it, an authentication process is requested. However, if the authentication fails, the transaction will not be refused (only for transactions from the rest of the world , as transactions made inside the Euro zone are subject to PSD2 and must be authenticated). If required by the bank, an additional authentication step must be completed by the customer  for the transaction to succeed.

Payment method management

    1. Log in to the Shopware back end and go to Settings > Payment methods.
    2. All the payment methods are listed and can be activated, deactivated or edited. You can also modify the order of displaying your checkout thanks to the “Position” field. 
    3. For credit cards, you can choose from the “Credit cards available” section (Amex, Visa, Mastercard, Maestro, Bancontact, CB).

Order management

You can manage the payment status thanks to the Capture / Refund / Cancel features with our HiPay payment plugin. 

Payment status

You can find the statuses of your payments in the Shopware orders overview.

Shopware’s payment status

HiPay’s transaction status

Description

Open

No transaction 

Default status for new orders, which  means no notification has been received.

In progress

Authorization requested / Capture requested /  Authorized / Pending / Challenge requested

The authorization or capture requested has not been validated yet. 

Authorized

Authorized

The payable amount from the payment request has been  authorized (not captured). 

Cancelled

Cancelled

The authorization has been cancelled. 

Paid 

Captured

The transaction has been successful and captured.

Paid (partially)

Partially captured 

The transaction has been successful and partially captured .

Refunded

Refunded

The transaction has been refunded.

Refunded (partially)

Partially refunded 

The transaction has been partially refunded. 

Failed

Failed / Expired / Blocked / Denied / Authorization cancelled 

The transaction has been declined or has expired 

Each order has a status history. 

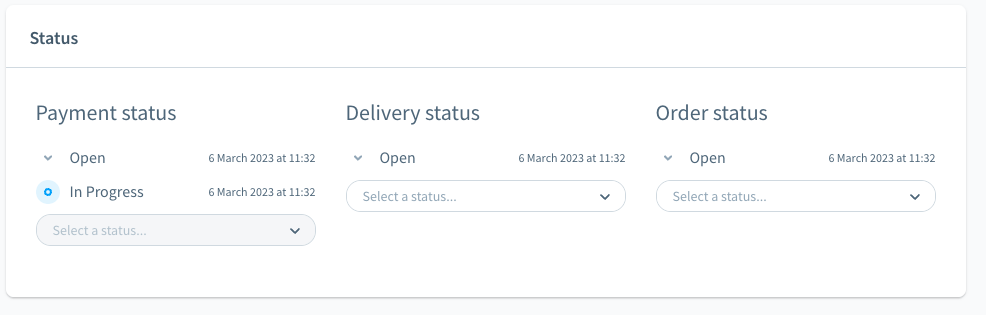
The HiPay payment plugin only processes the payment status. Delivery and order statuses are not within the scope of our plugin.

Our plugin enables you to monitor HiPay’s notifications relating to the payment status in the order details page.

Full/partial capture 

To use this feature, you have to select the “Manual” capture method. The transaction’s payment status must be “Authorization accepted”. 

Here is the process to make a capture: 

    1. Log in to the Shopware back end and go to Order > Overview.
    2. Select a transaction with the “Authorized” payment status.  
    3. Click on the “Capture” button. 
    4. A pop in window gives you the possibility to make a partial or full capture by filling in the “Capture amount” field. 

Full/partial refund 

To use this feature, the transaction’s payment status must be “Paid”. 

Here is the process to make a refund: 

    1. Log in to the Shopware back end and go to Order > Overview.
    2. Select a transaction with the “Paid” payment status. 
    3. Click on the “Refund” button. 
    4. A pop in window gives you the possibility to make a partial or full refund by filling in the “Refund amount” field. 

Order cancellation

To use this feature, you have to select the “Manual” capture method. The transaction’s payment status must be “Authorization accepted”. 

Here is the process to cancel an order: 

    1. Log in to the Shopware back end and go to Order > Overview.
    2. Select a transaction with the “Authorized” payment status. 
    3. Click on the “Cancel” button. 
    4. Once the cancellation has been confirmed, the payment status changes to “Cancelled”.

One-click 

One-click is a feature allowing customers to make purchases faster with payment information already saved. 

It is only available for Hosted Fields and with credit cards. Users must create an account in your store to save or delete credit cards. Then they can choose one of their saved cards or add a new card to pay.  

This feature is available in the configuration of our plugin: 

    1. Log in to the Shopware back end and go to Settings > System > Plugins.
    2. Find the HiPay payment plugin and select the action button (…) > Config.
    3. Activate the option “Using One-click payment”.